This document provides high level guide for hosts on how to create an event website, how to configure it, how to send invitations and how view RSVPs.
Step 1: Create an Event Website
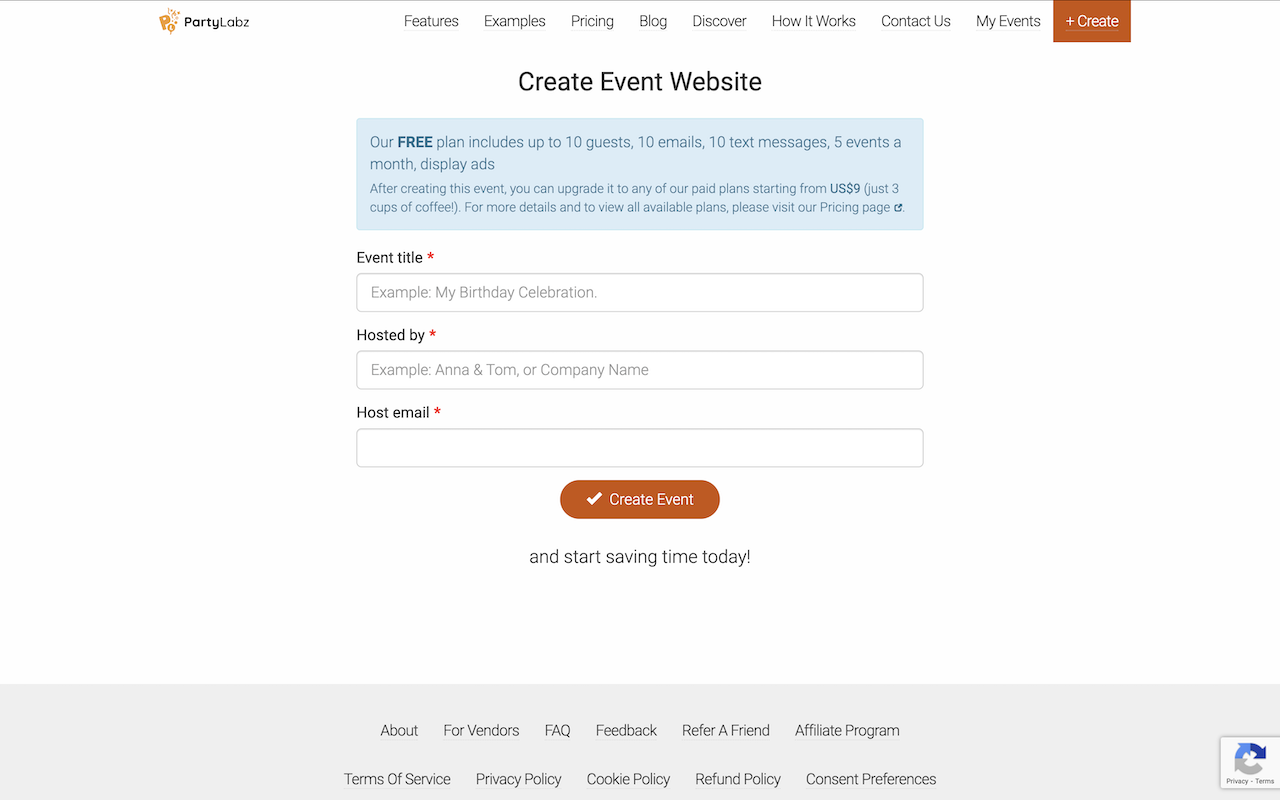
To create an RSVP website you only need to enter your event title, your name and email address.
The system will need to confirm your email by sending an email with auth code. No password needed. If you change your browser or clear cookies you will be asked for auth code again.
Please note that if you did not get an email with auth code it either got to the Spam folder or your email server rejected our email. In case you have company's email server we advise you to add @partylabz.com into an allow list.
Step 2: Provide Event Details
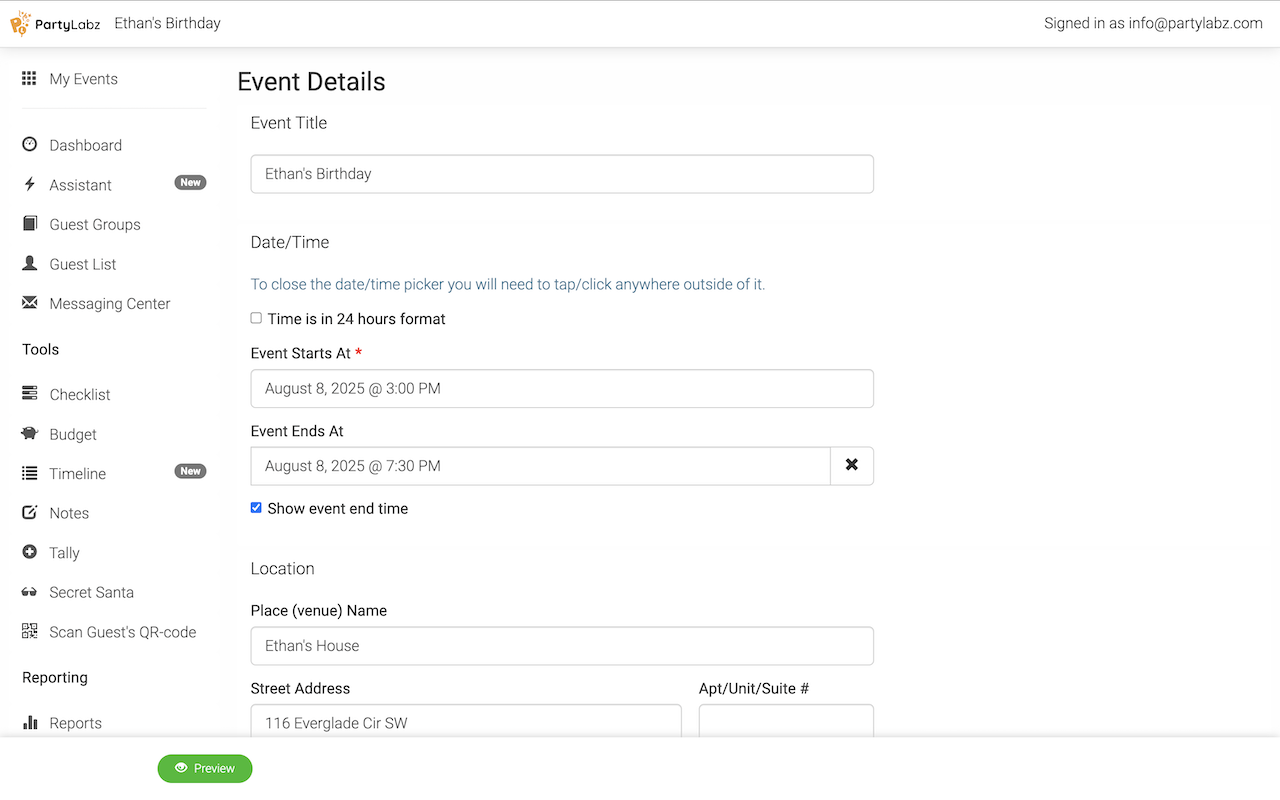
Add essential information such as the event date, time, location, and, if needed, an event description.
IMPORTANT: The website has the following modes of display event website to its visitors:
- Anonymous Visitor: This category includes anyone who visits the event website but remains unrecognized by the system.
- Guest: A guest is a visitor who possesses a unique personal ID embedded in the event website URL, found in the URL parameter '?guest=...'
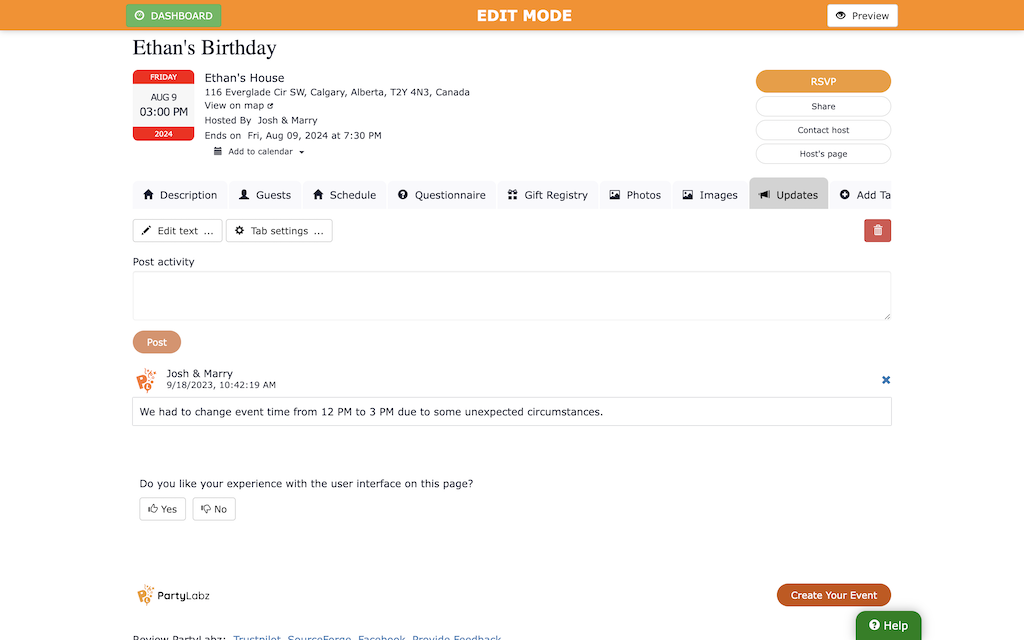
- Host or Co-host: This classification applies to visitors who not only have a unique personal ID in the event website URL ('?guest=...') but are also signed in to the system, with corresponding roles assigned to them for the event website. If you spot an orange bar with “EDIT MODE” caption at the top of your screen, the system recognizes you as a host or co-host. This puts you in the event management mode, granting you the ability to make modifications to your event website, view your guests' RSVPs and send invitations or messages to your guests.
Step 3: Customize Appearance
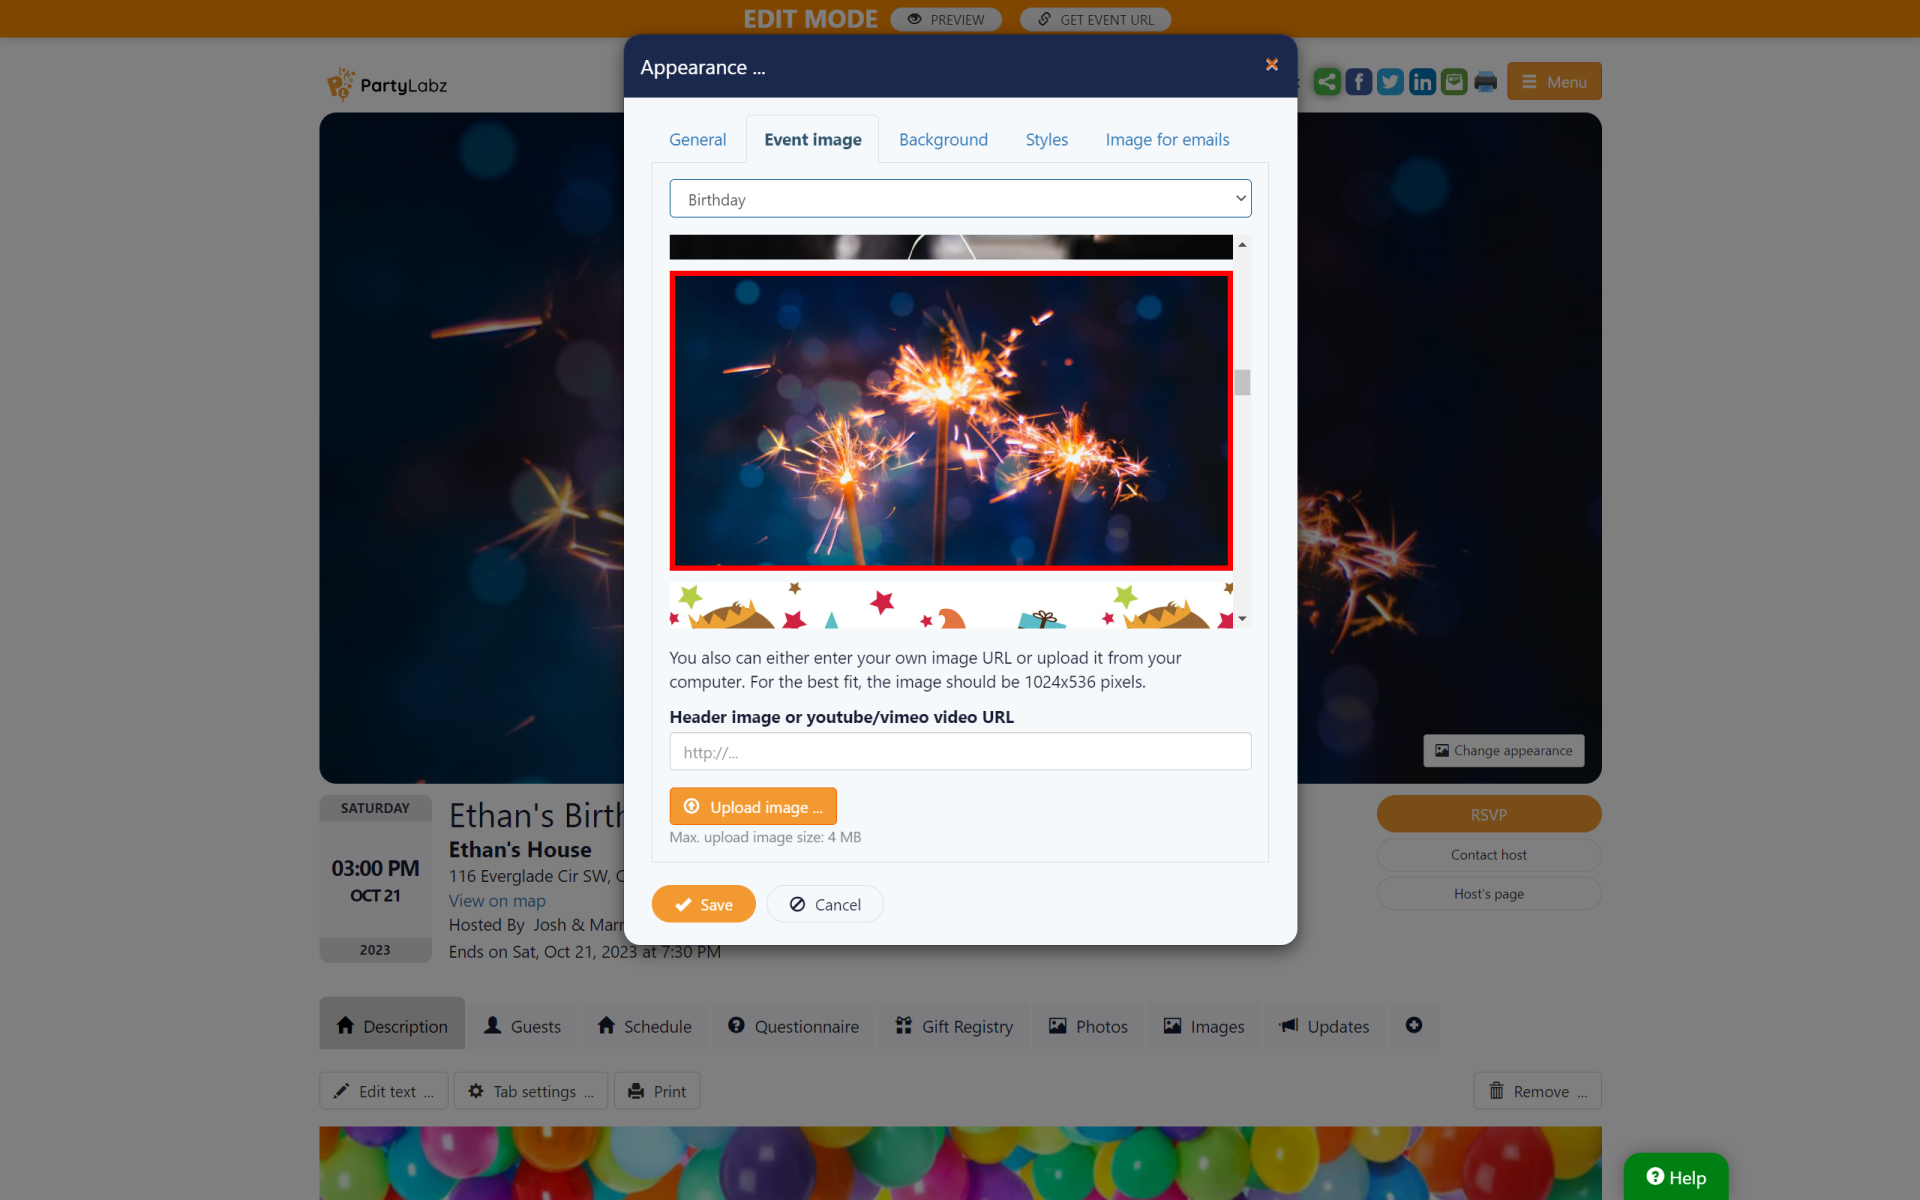
Let your creativity shine by selecting or uploading your event image and customizing your event website's style. Make your event website visually captivating – it's your canvas!
Step 4: Add More Content
If necessary, expand your event website with additional pages (tabs) containing information that guests might find useful, such as accommodation options, parking instructions, and more.
Please take note that you have the flexibility to set page visibility. You can make a page accessible to everyone, restrict it to guests, or limit access to host/co-hosts exclusively.
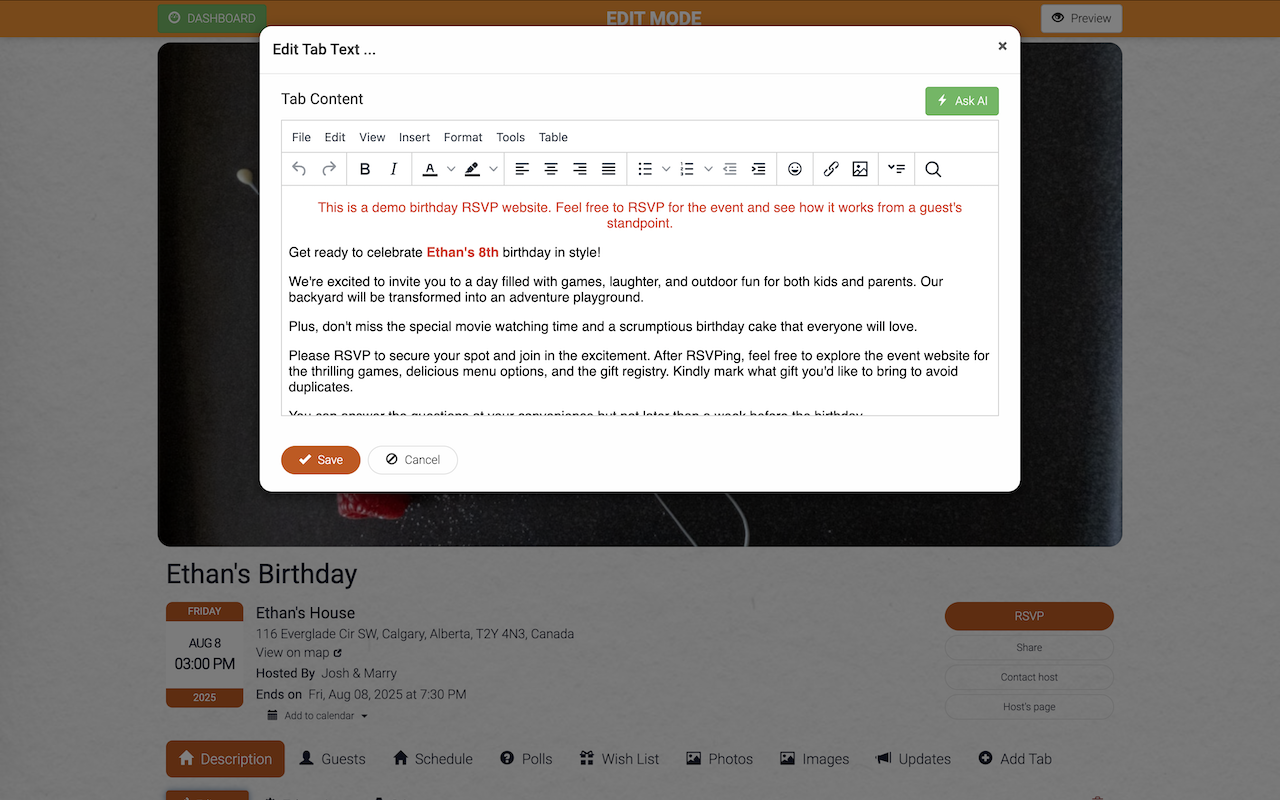
Step 5: Add Polls, Signups, and More
Engage your guests with interactive elements. Create polls to gather opinions, set up signup lists, showcase a photo gallery, encourage comments, and keep everyone updated with an activity wall. You can even share files and organize a secret Santa game for added fun.
Step 6: Configure Your RSVP Page
Now, let's dive into configuring your RSVP page for a seamless guest experience.
Click on the “Menu - Event Settings - RSVP”.
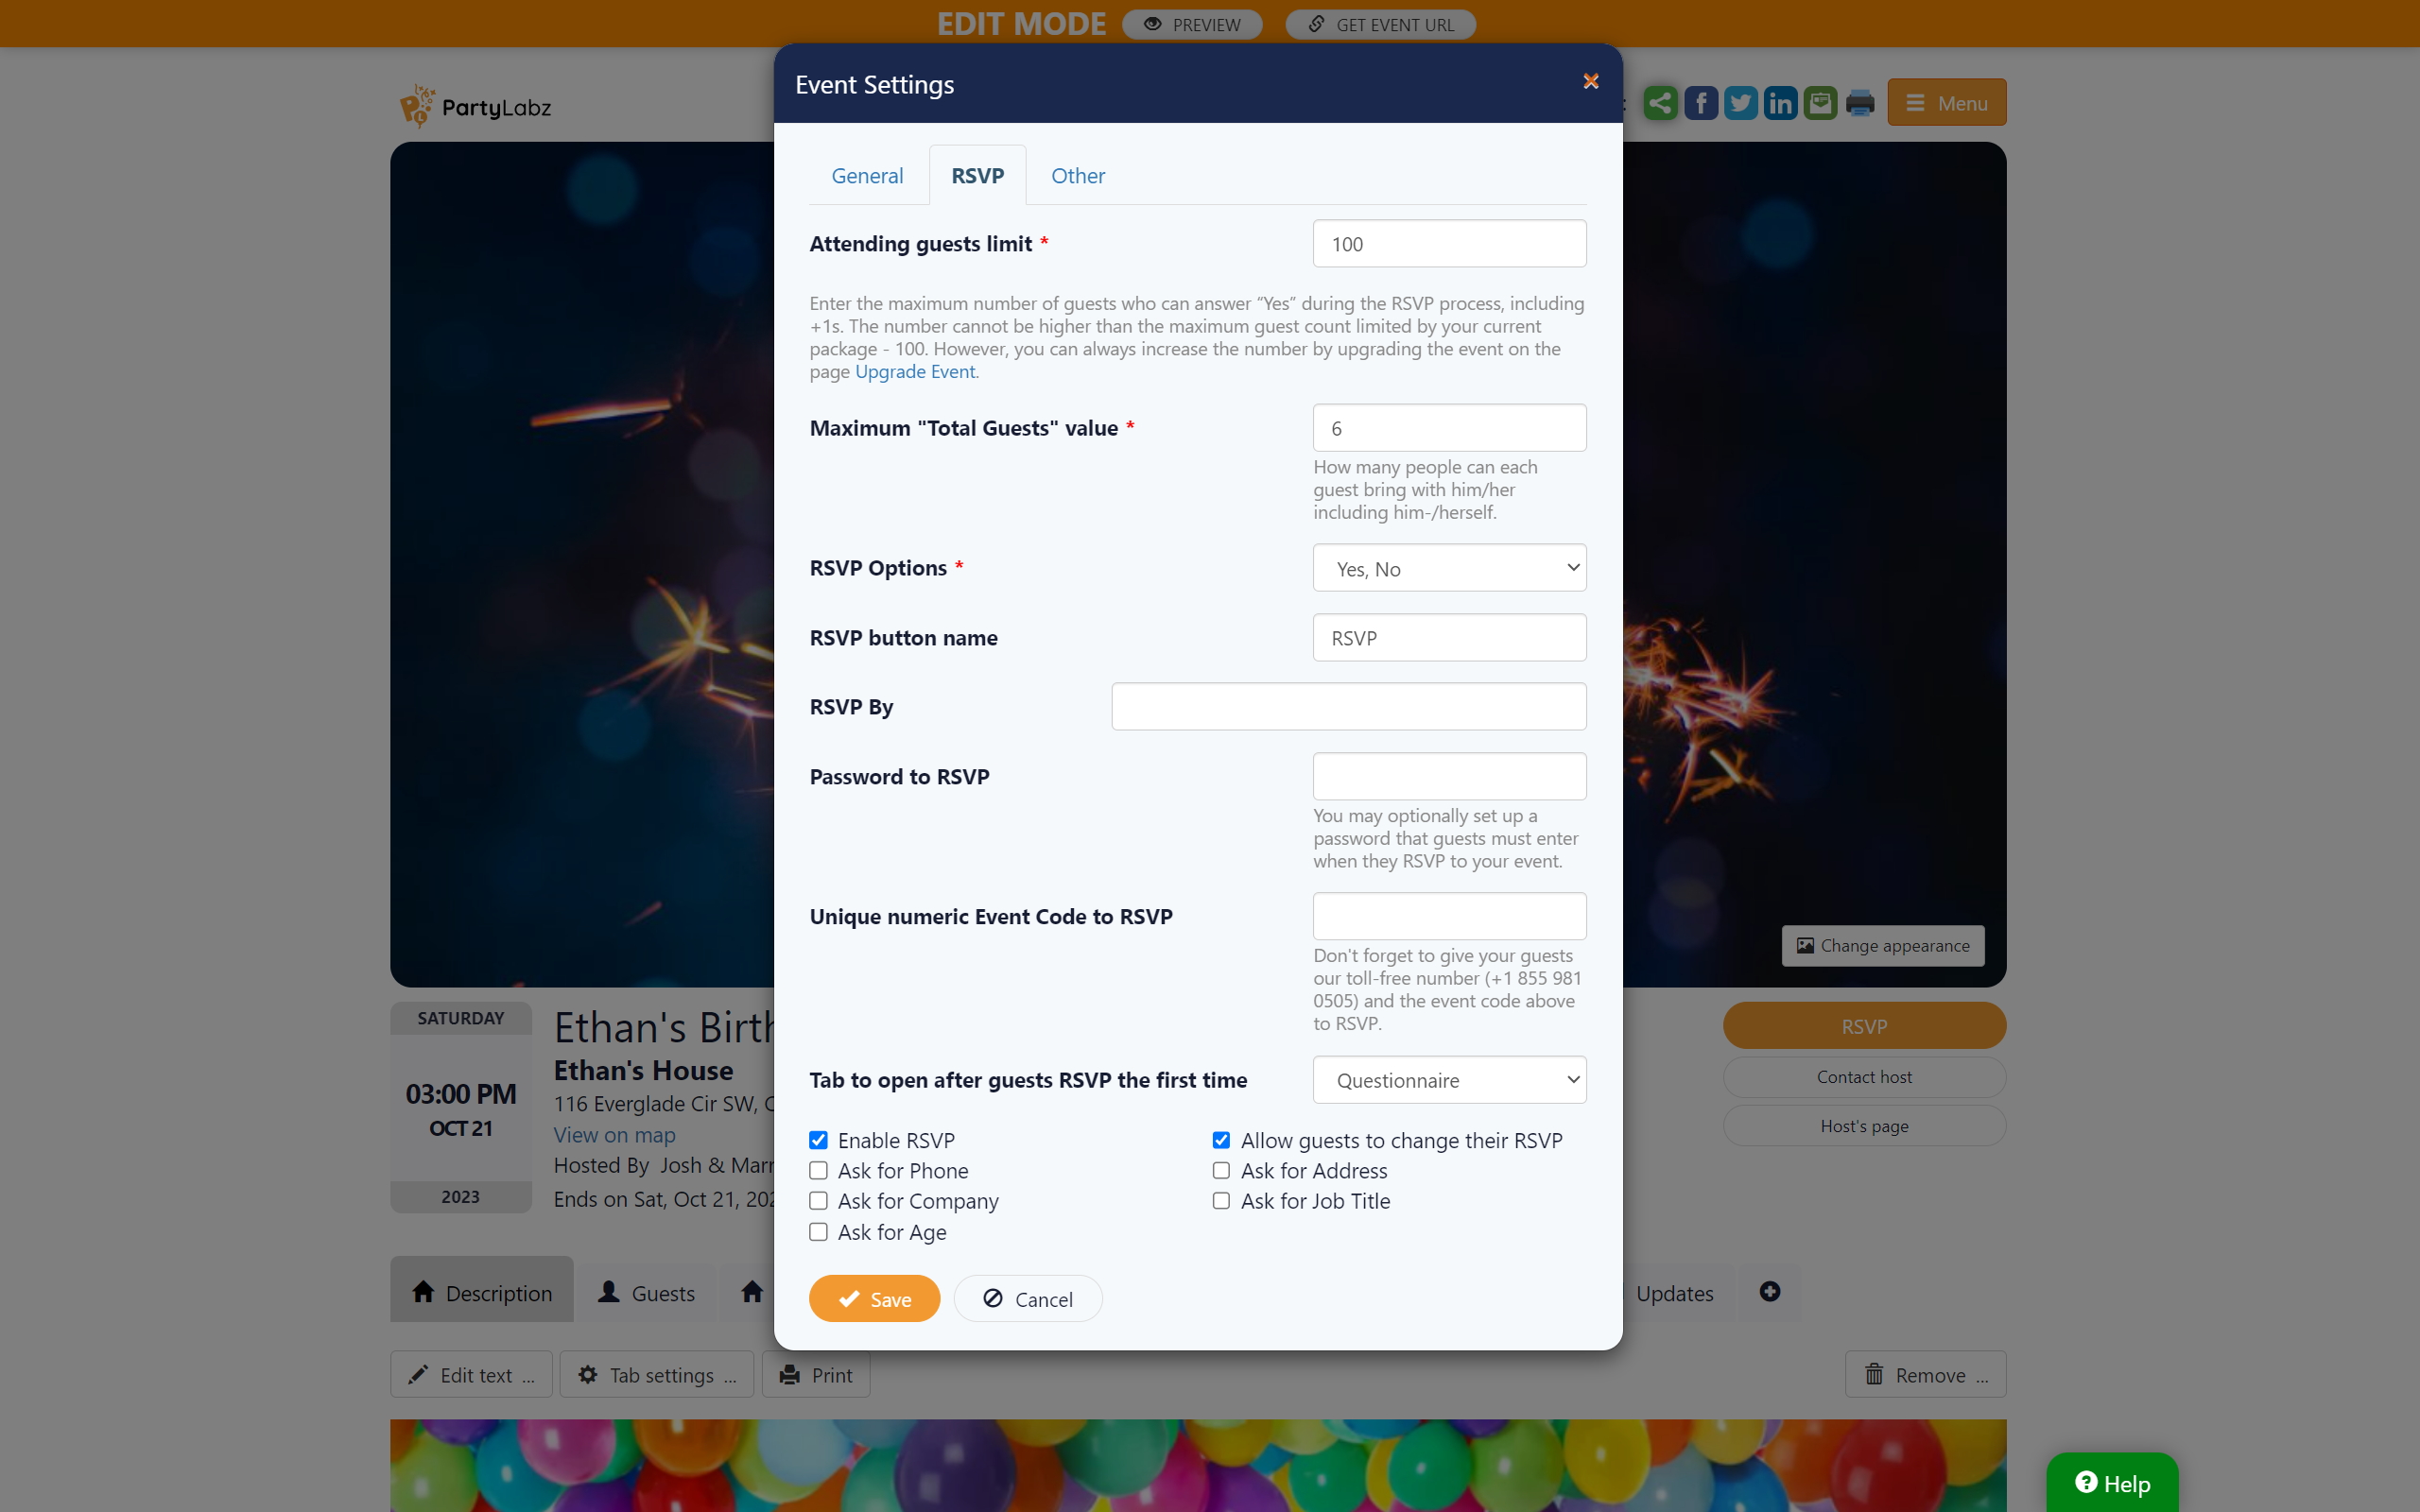
You can chose to change whatever you need for your event or use the default values
- Attending Guests Limit. Note: This value cannot exceed the guest limit of your plan.
- Maximum Total Guests. Note: If you enter the value '1,' it means that guests will not be allowed to bring any additional +1s.
- RSVP Options. Select the RSVP responses that align with your event's requirements.
- RSVP Button Name. Note: Please keep it short to fit the name in the button.
- RSVP By. Specify the date when RSVP acceptance will automatically close.
- Password. If desired, you can set a password that guests must enter to RSVP.
- Unique Numeric Event Code to RSVP. This code is used by anonymous users to identify the event to RSVP. Available in paid events only.
- Tab to Activate After Initial Guest RSVP. This redirection option is particularly useful if you have polls or a signup page.
- Enable RSVP. You can manually control whether to accept RSVPs at any given moment.
- Allow Guests to Change RSVP.
- Predefined RSVP questions. These checkboxes enable corresponding questions on the RSVP page.
As you can see, PartyLabz provides a plethora of tools to tailor your RSVP page to your event's unique specifications. You have the flexibility to choose which options to use, making the RSVP configuration entirely adaptable to your needs.
Step 7: Customize Auto-Responses
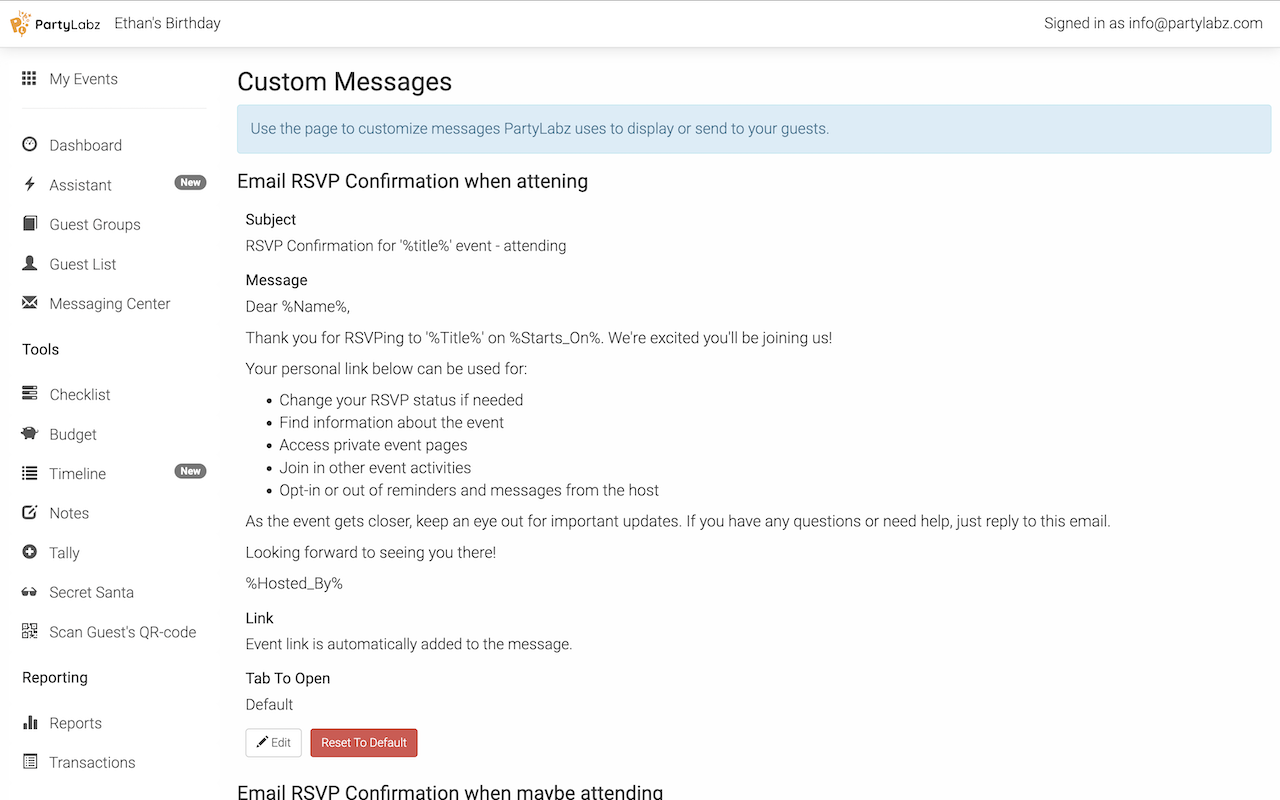
Keep in mind that you can change the default messages our system sends as RSVP confirmations via email or SMS.
For instance, you can include special information in the RSVP confirmation for guests who have RSVP'd as attending your event. Alternatively, for negative responses, you can express your regret at missing them.
To customize these auto-responses, simply navigate to the "Menu - Custom Messages" page. Customization is available for both email and text messages RSVP confirmations.
Step 8: Configure Event Reminders
Each event comes with default reminder settings, but you have the flexibility to modify, delete, or create your own reminder schedules tailored to your event's needs. To set up reminders, simply access the 'Menu' and click on the 'Reminders' option. Our platform supports various types of reminders to enhance your event planning:
- Remind to RSVP. This reminder will be sent to guests who haven't RSVP'd after you've invited them using PartyLabz invitation capabilities.
- Remind about the Event. A reminder that will be sent exclusively to attending guests.
- Remind to Answer Polls or Sign Up for Activities. This reminder is automatically generated when you add Polls or Signup pages. It's sent to attending guests who haven't responded to poll questions or signed up for activities.
Please note that you can customize reminder texts on the "Menu - Custom Messages" page. Any reminder of the same type will use the text provided there.
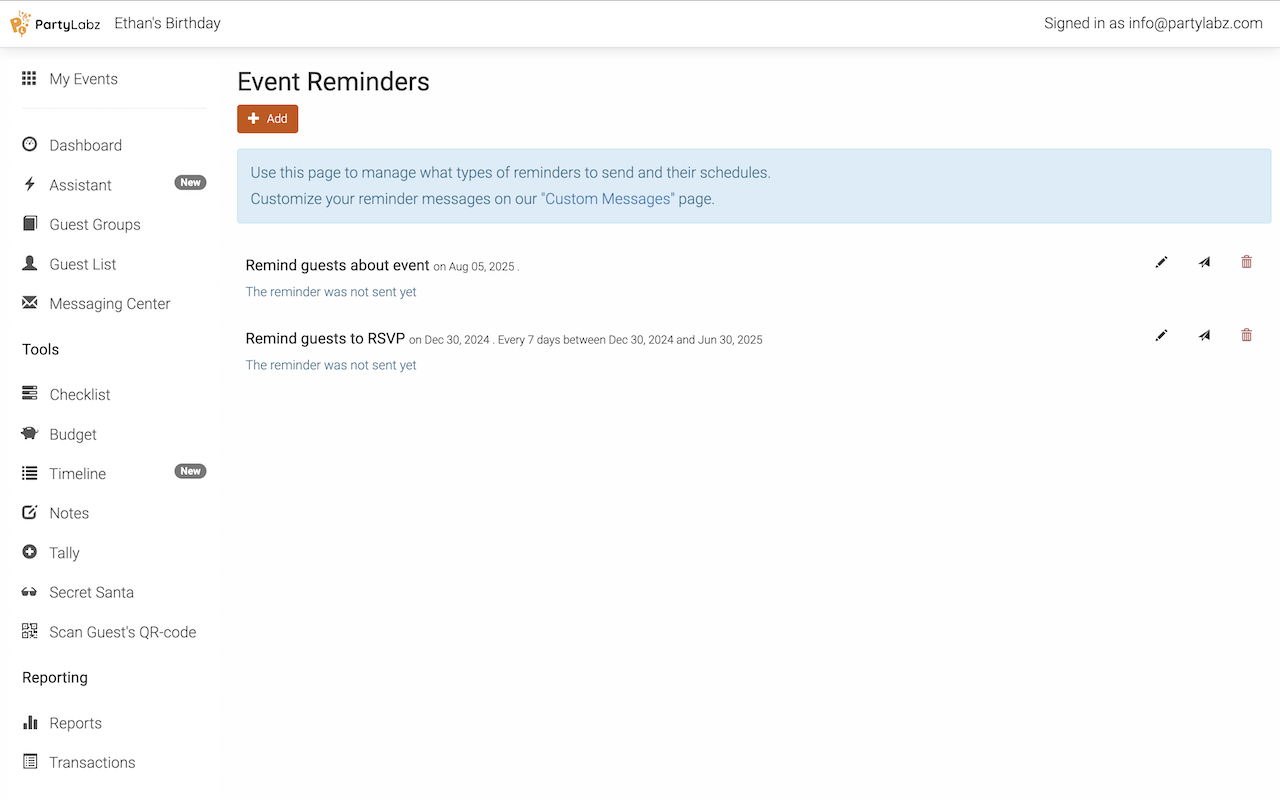
Important: Reminders work only via Email and are not yet supported in text messages.
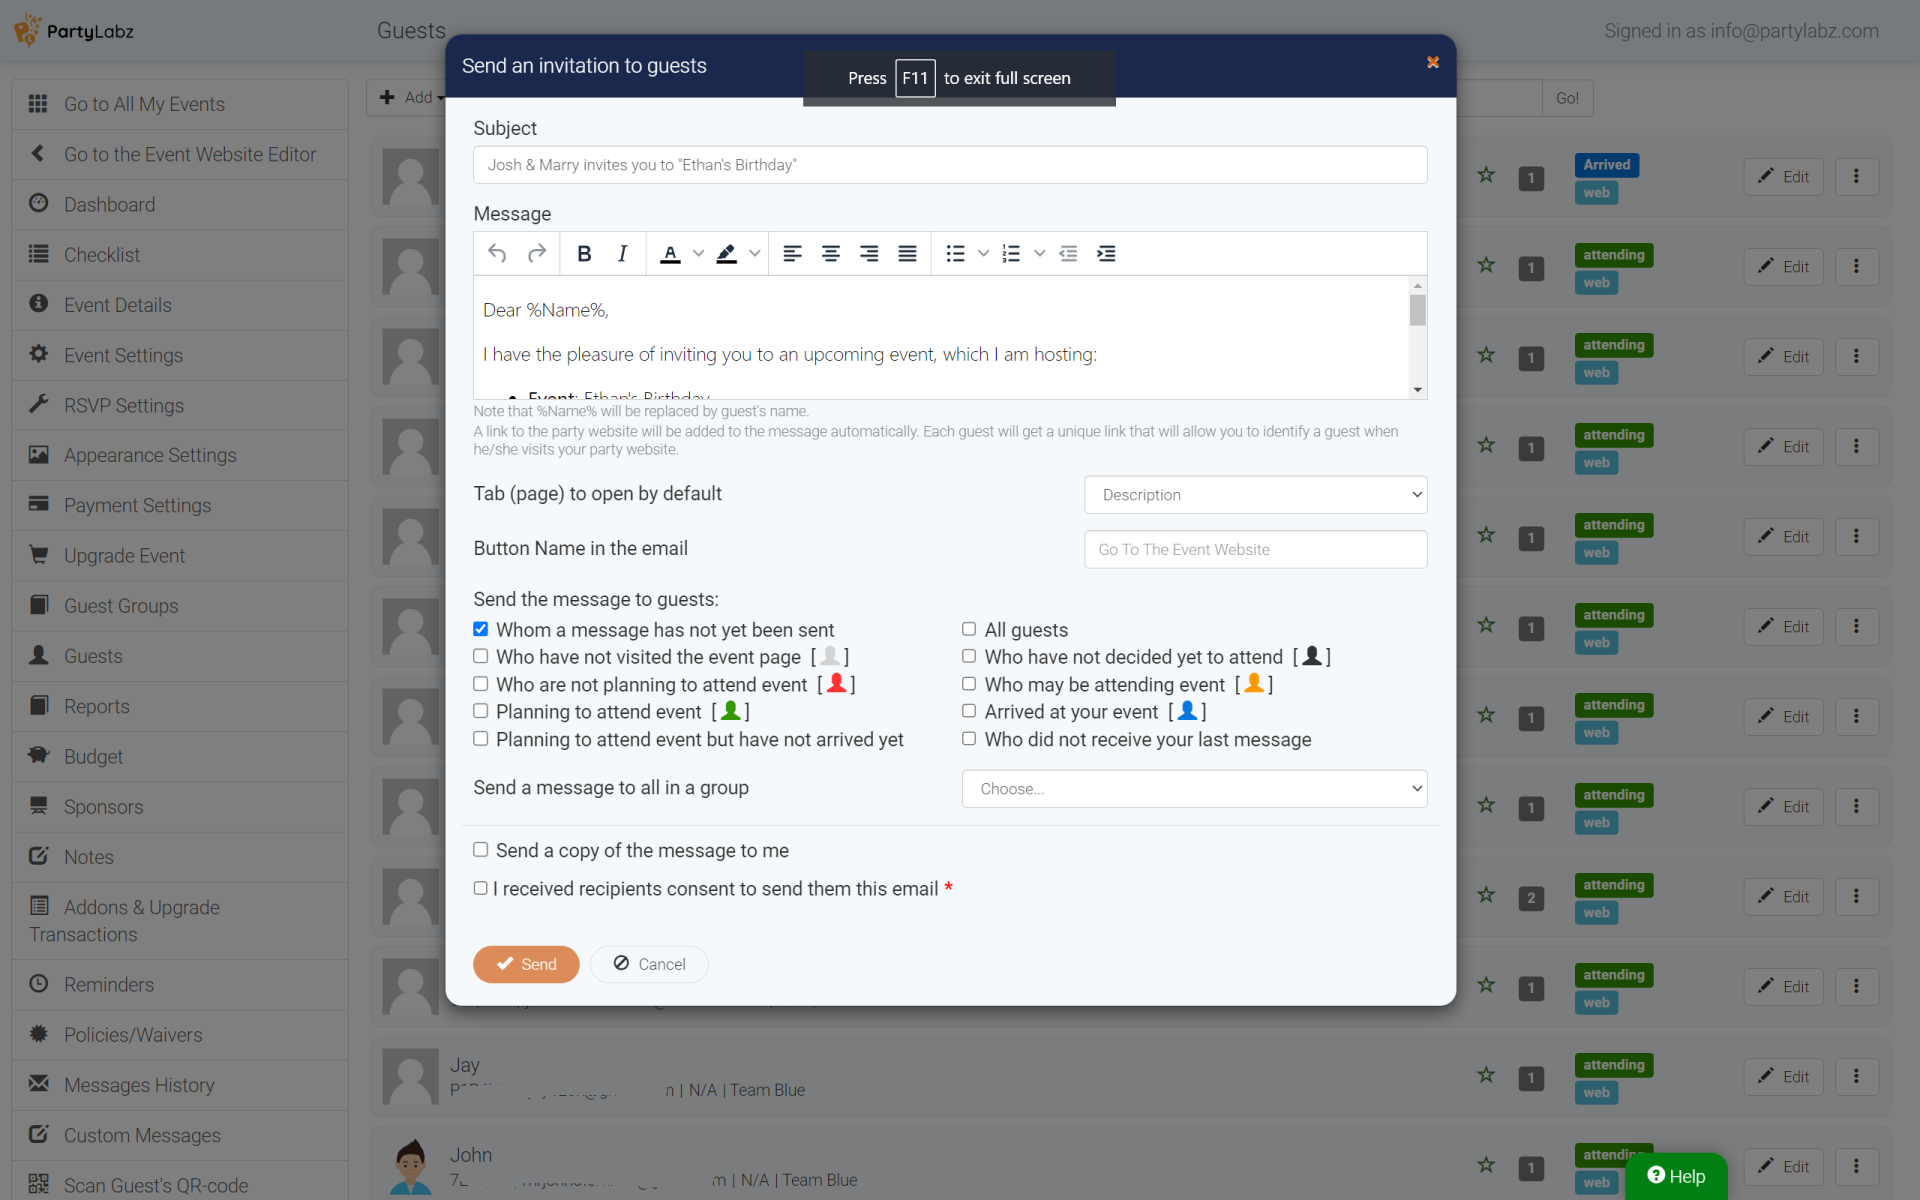
Step 9: Send Invitations
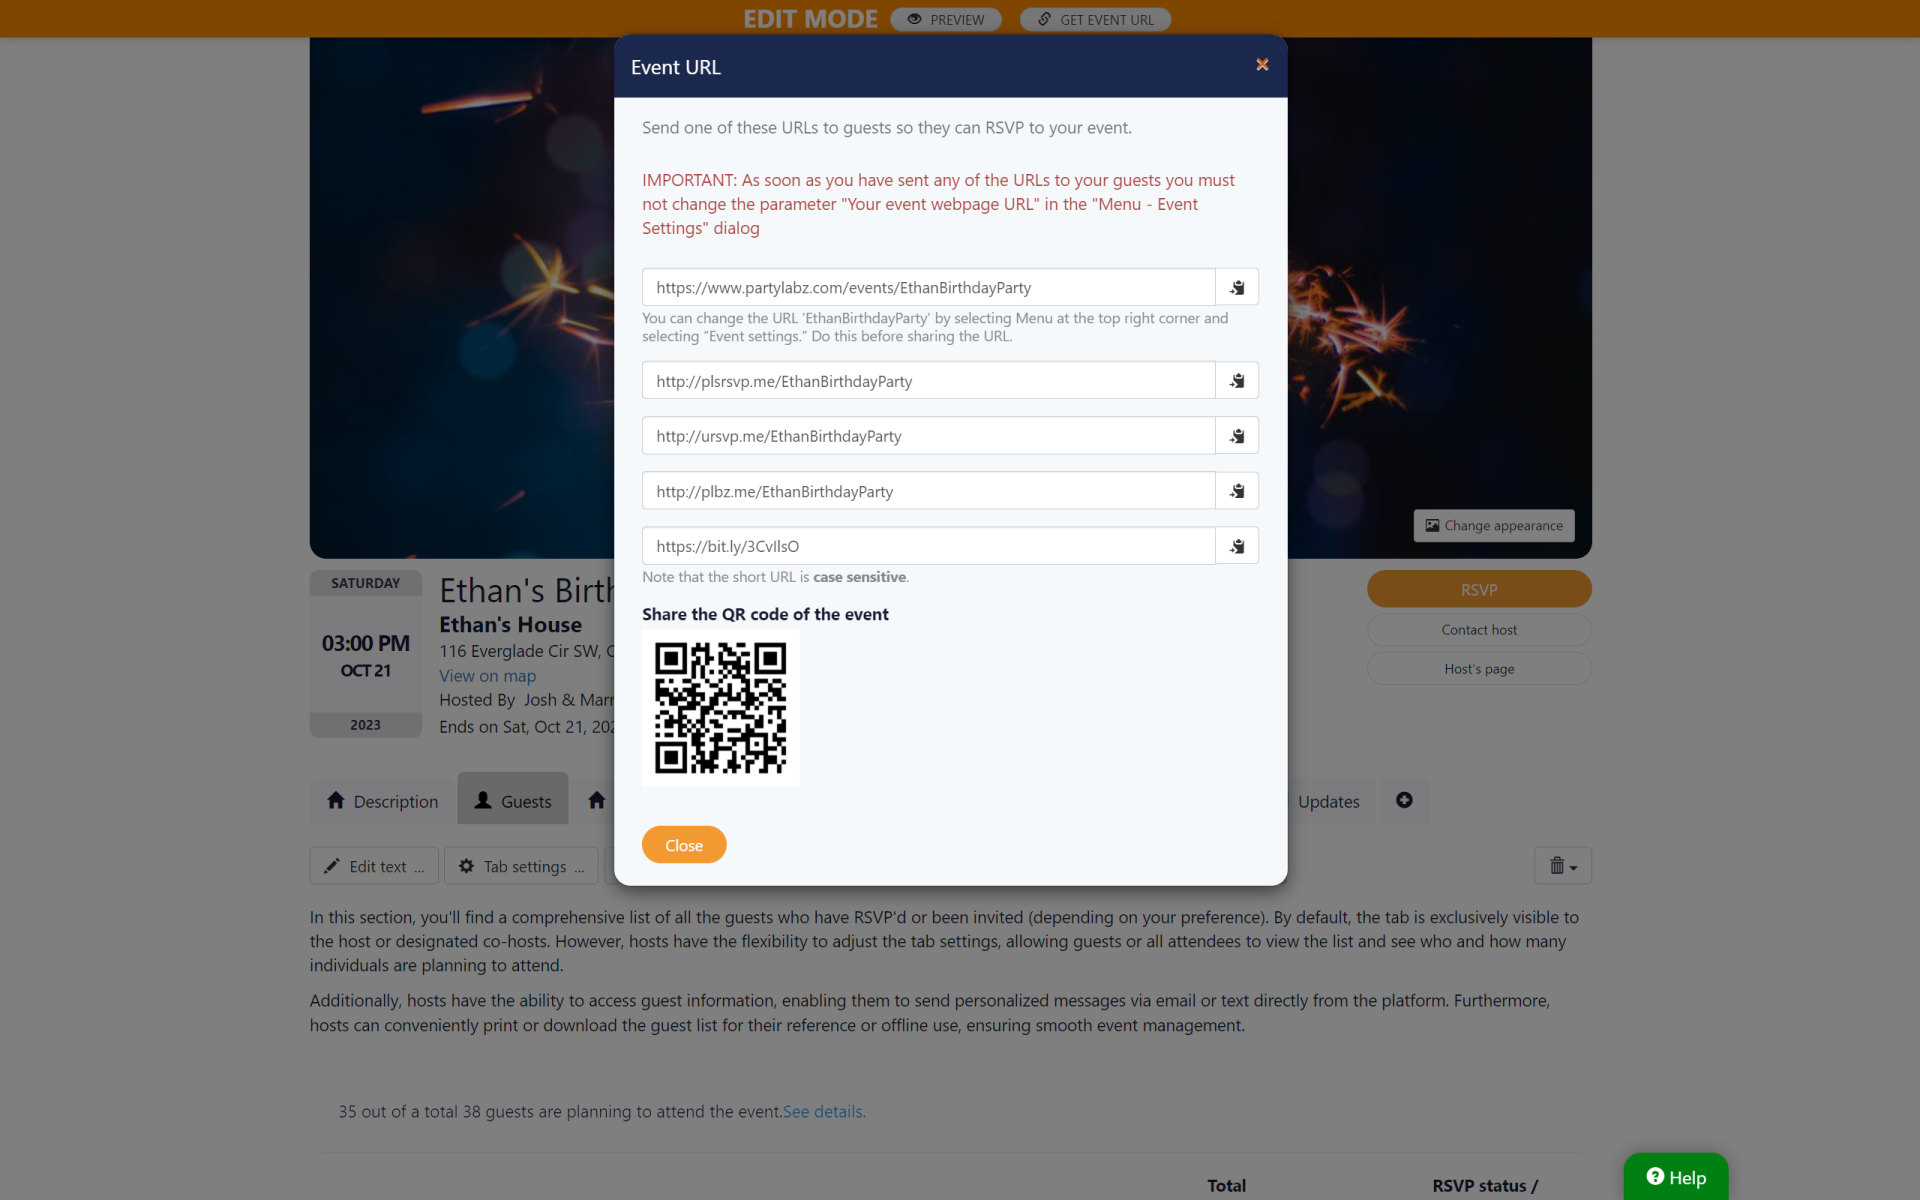
Inviting Guests via External Channels with Event Website URL or QR Code
Share your RSVP website URL with guests through social media, messaging apps, or print it on paper invitations.
Click the "Get Event URL" button on the top orange line to obtain the event website URL or its QR-code.
Inviting Guests via Email or Text Invitations Within PartyLabz
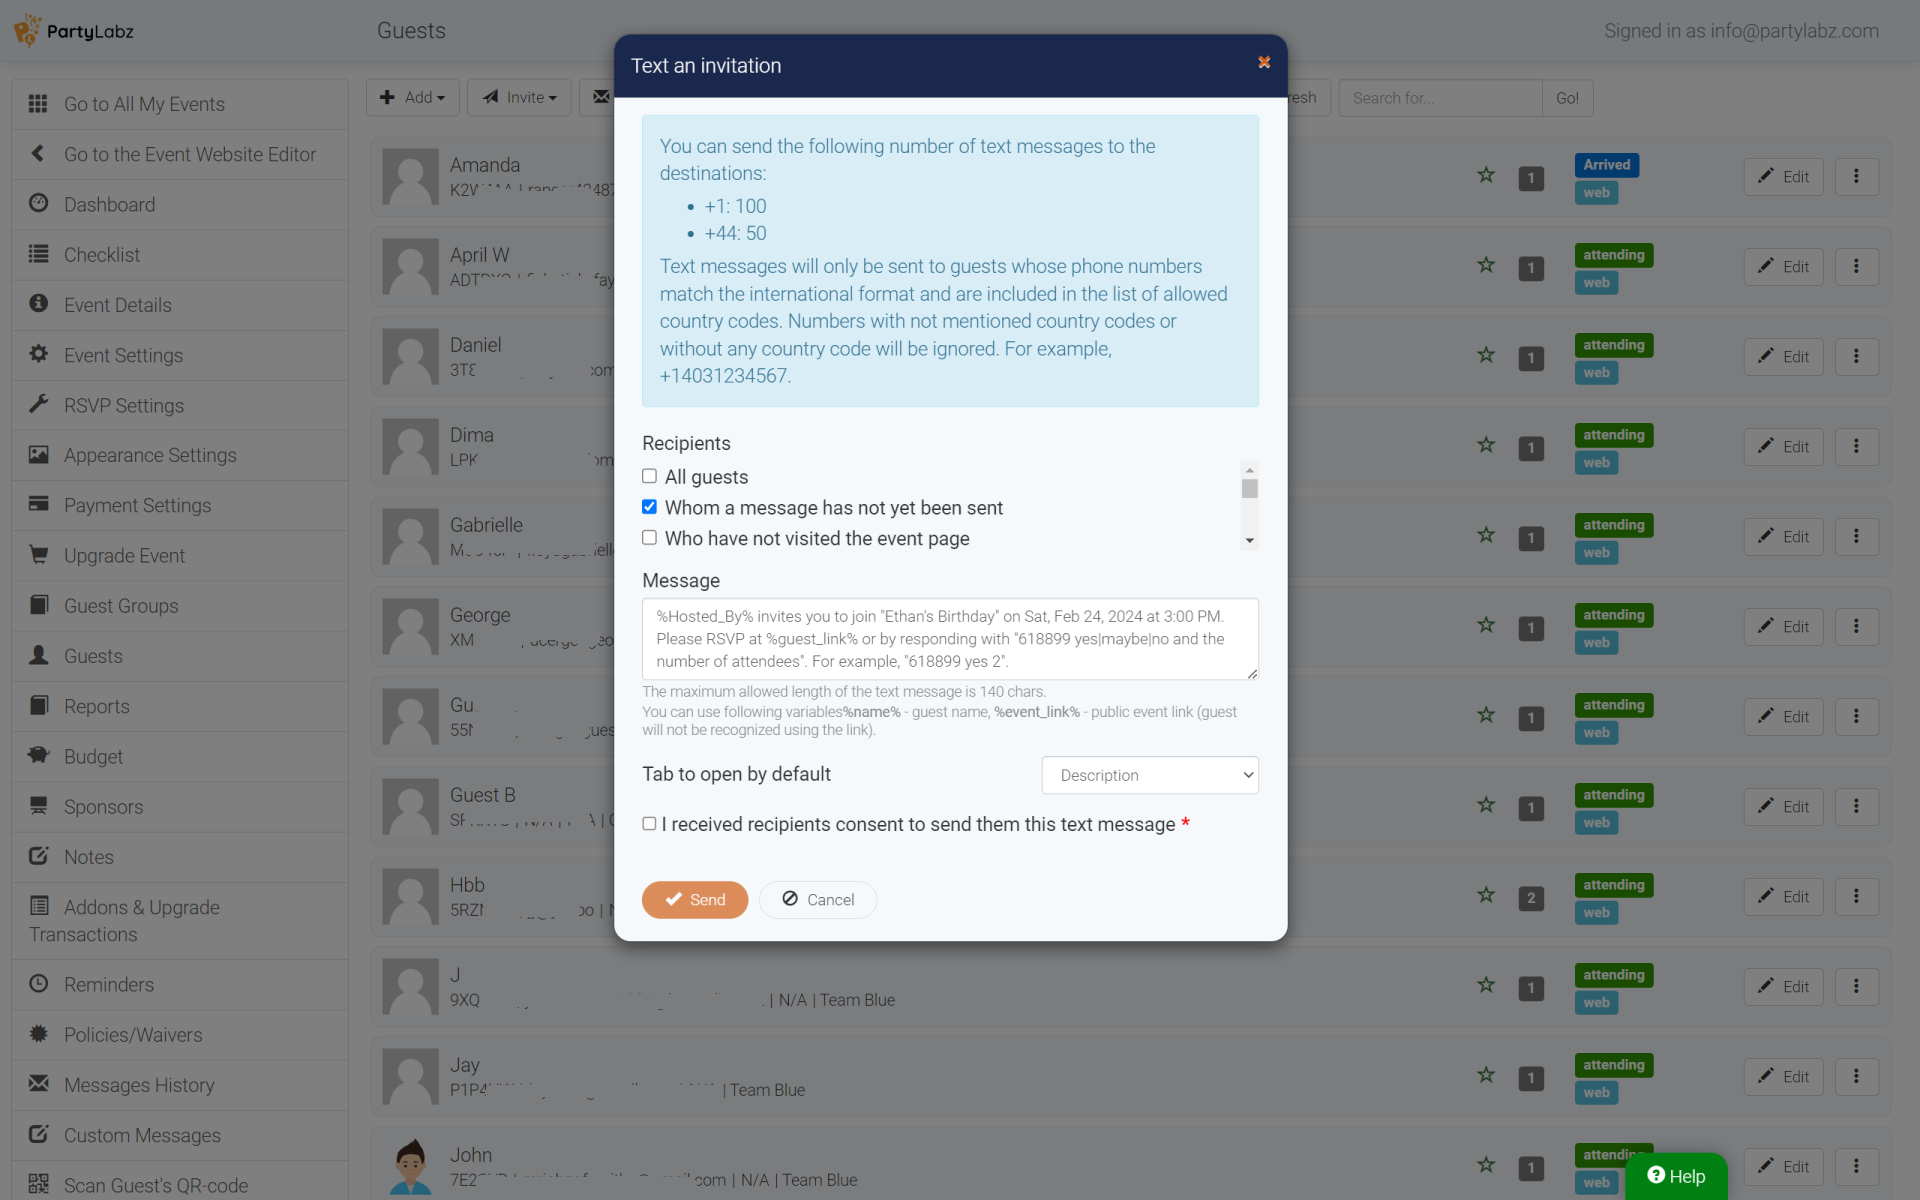
Alternatively, add guests manually, import them from Google Contacts, upload a CSV file, or import from previously created events. Then, send invitations via email or text messages (available in paid plans and in the US and Canada only).
Step 10: View RSVP Results
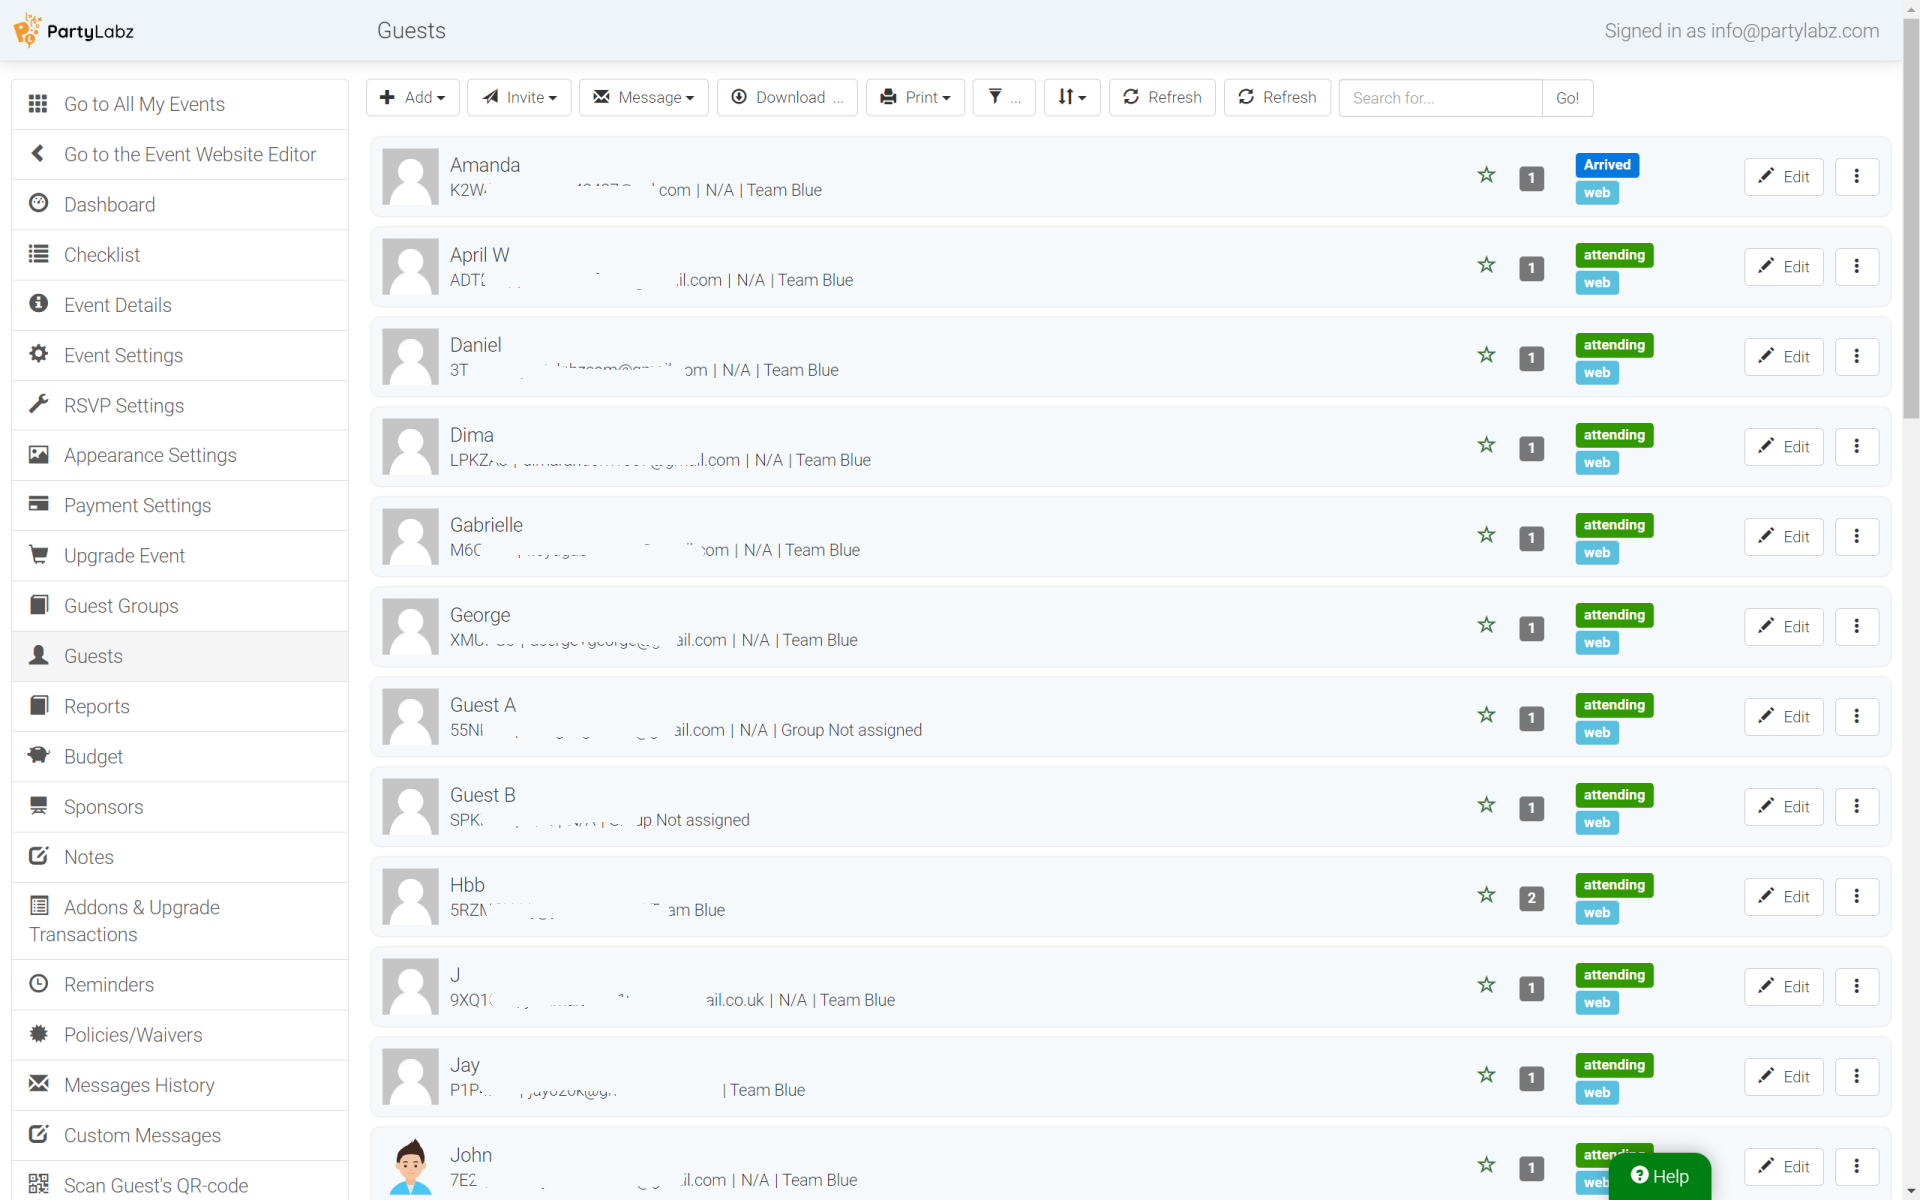
Monitor your guests' RSVPs online, via text messages, or phone calls. At any point, you can check who has RSVP'd, participated in polls, or signed up for your event.
Please note: the email delivery status is available only for premium plans.
Step 11: Communicate with Guests
Stay connected with your guests throughout the event planning process. Send event updates and vital announcements via email, text messages or updating your activity page, ensuring everyone stays informed and engaged.
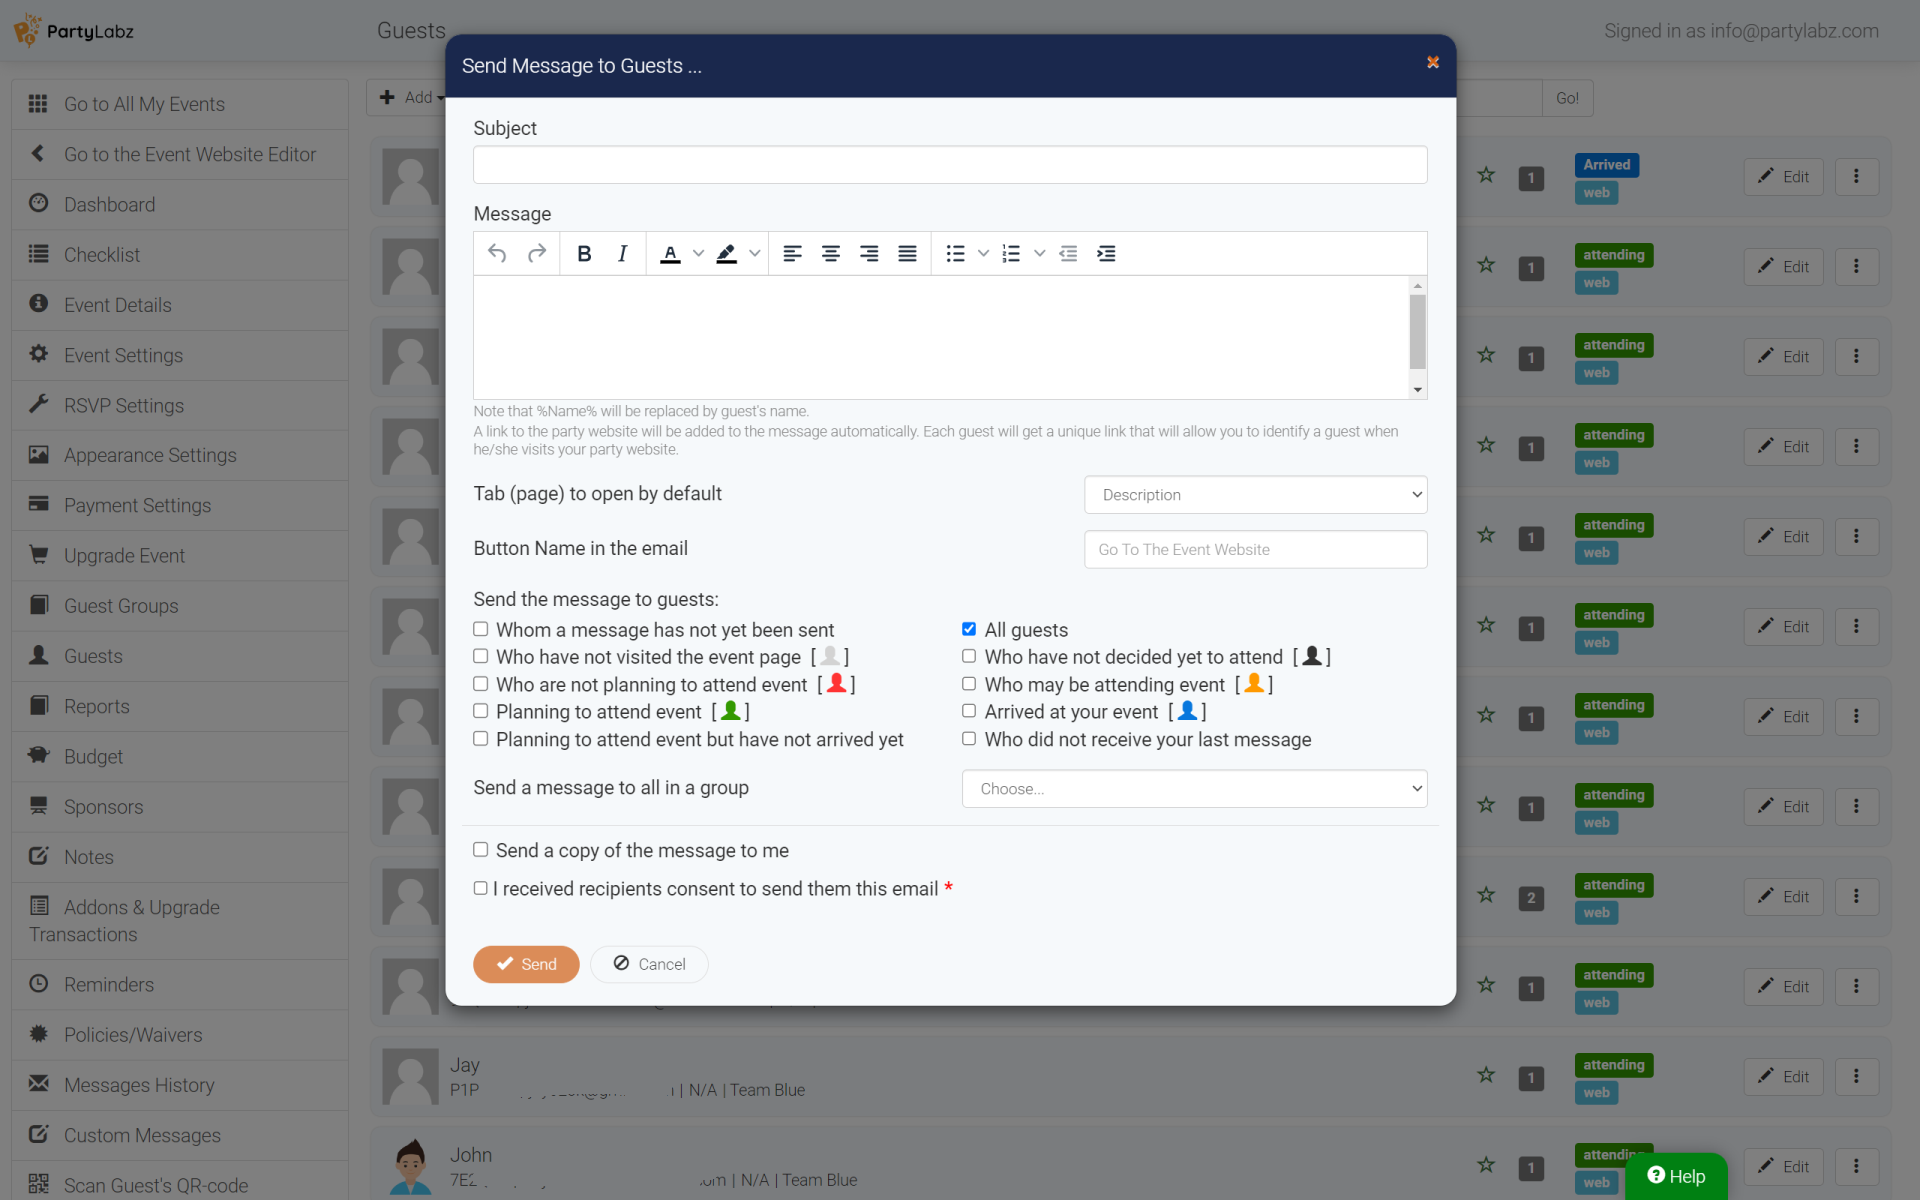
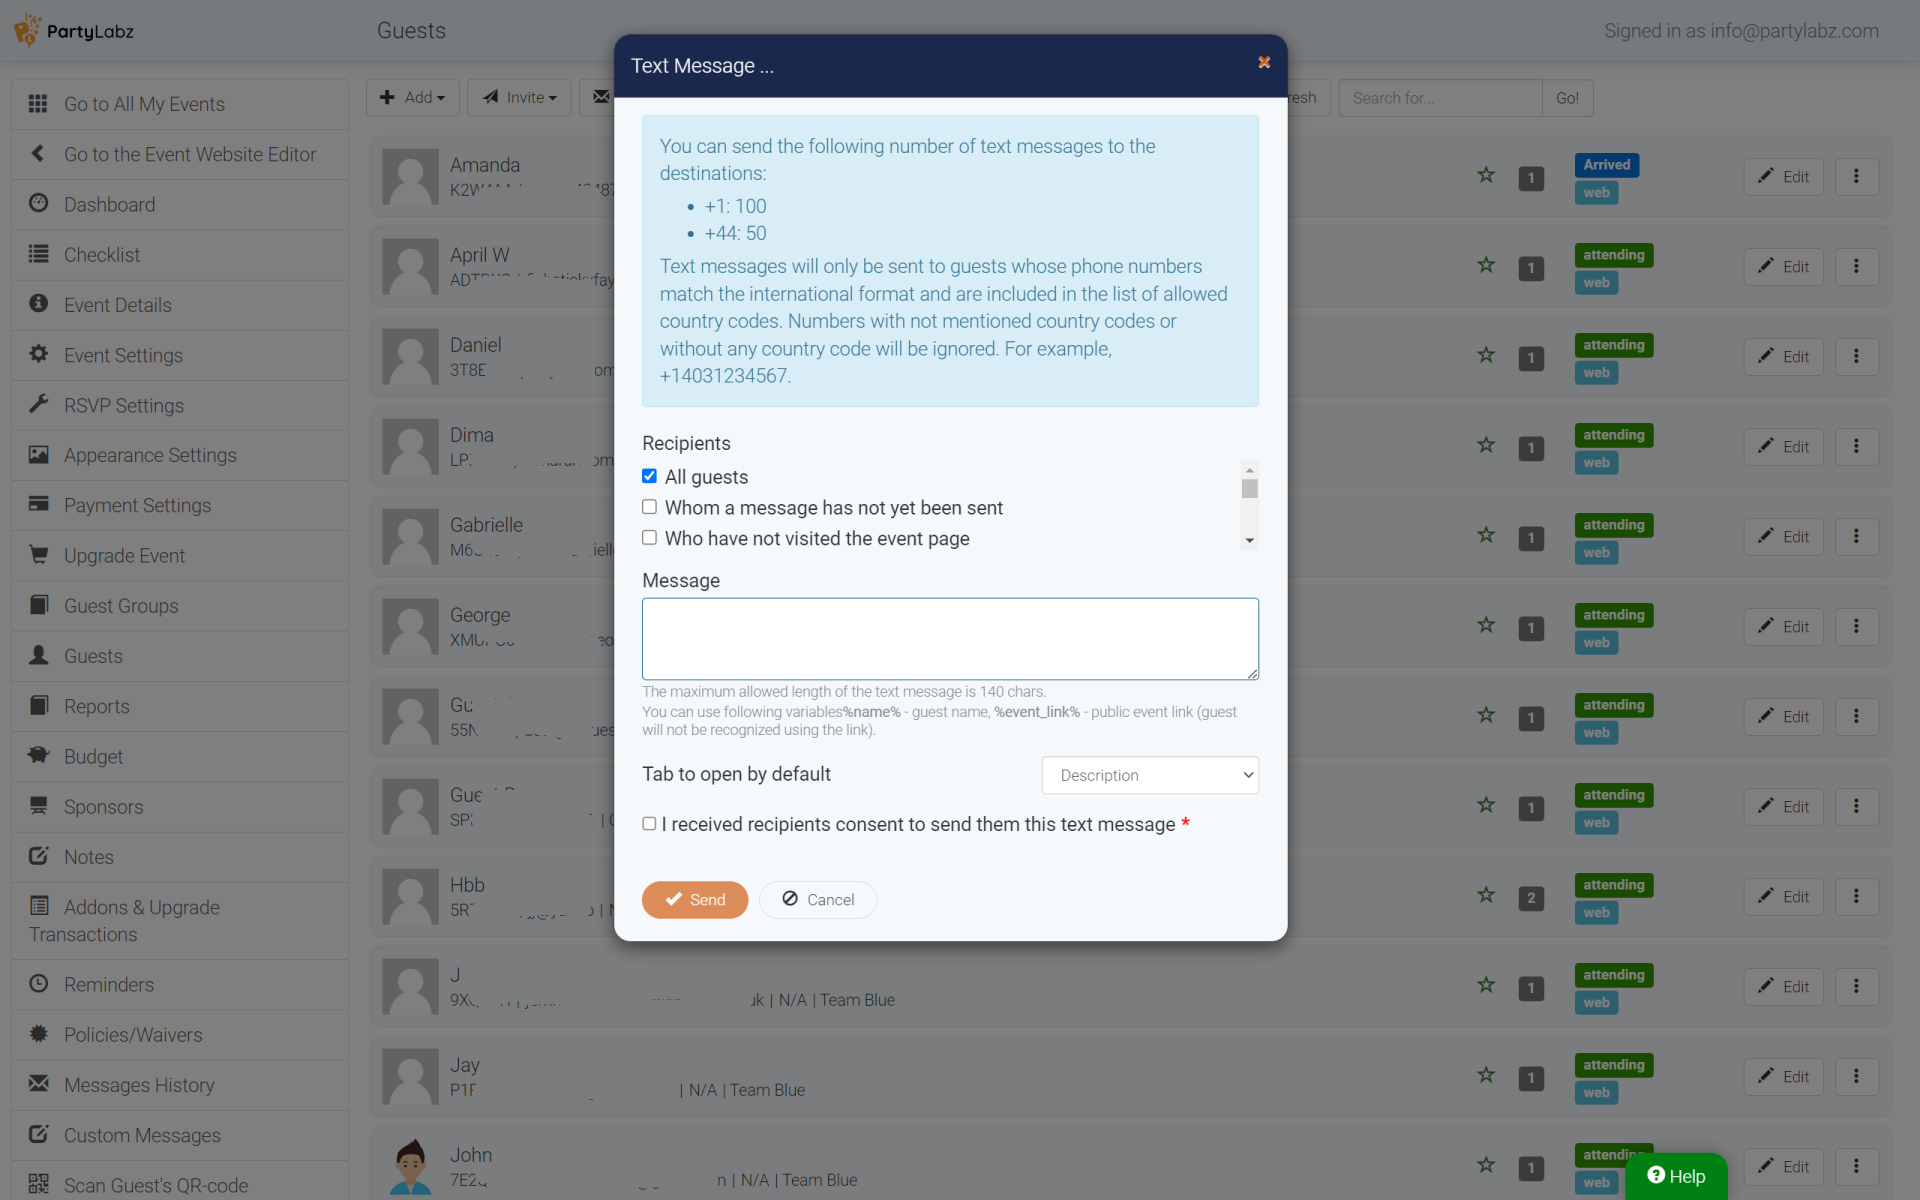
To send a message to your guests, simply head over to the "Guests" tab, and click on the "Send" button. From there, you can choose between sending an "Email Message" or, if you're on a paid plan and your guests have provided phone numbers, select "Text Message". In the ensuing popup dialog, compose your message, select the recipient groups, and then click the "Send" button to transmit your message.
With PartyLabz, you can streamline event planning, maintain clear communication, and create an enjoyable experience for organizers and attendees alike.


